lin_net: pixel art of a Honey Shroom from Paper Mario (Default)
I didn't make any progress on the metaroom project over the week, but I planned this as a weekend project so that's fine! Here's my next batch of progress.

I toggled elements on and off throughout for this one to make the WIP renders faster, so it's less obviously linear visually than the last post was.


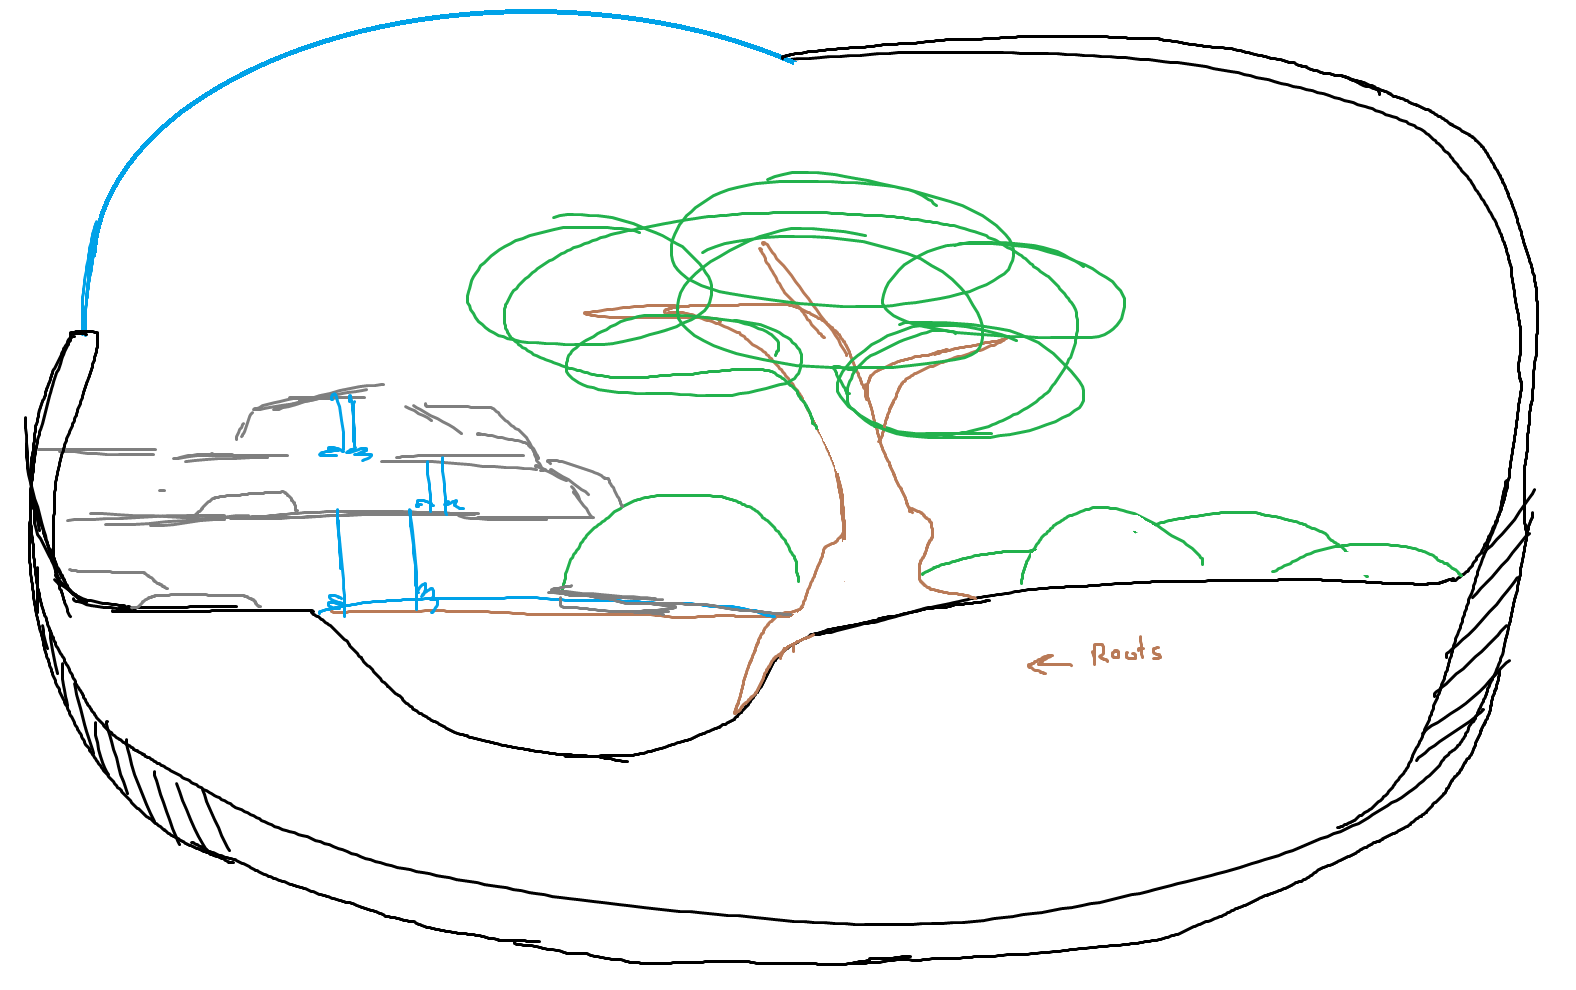
WIP 7: Backdrop progress - set up a material for the big window and made a space background. Window material is glossy mixed with transparent - it's meant to be glass, but since I don't want refraction for this, using the actual glass shader would just introduce noise and fireflies. The patterning on it is a voronoi texture hooked up to the material's displacement, I think with a color ramp to tweak the effect a bit.
The space background I just made in photoshop and set up as a low-strength emissive texture for a fullbright effect. (It's a few layers of generated stars with a recolored nasa photo added in.) Also I adjusted the lighting so it's a good bit brighter.
Read more... )

lin_net: pixel art of a Honey Shroom from Paper Mario (Default)
I've tried to make a C3/DS metaroom background a few times (okay, a lot of times) through the years but I've always bounced off it, either due to a lack of skill, lack of any concept or scope issues. I thought I'd work on a really simple one as a weekend project / proof-of-concept kind of thing, since I think I'm at a point where this is a thing I can actually do.

garden metaroom concept
Concept sketch: MS paint doodle. Rough concept of a Japanese-style garden with a big cool tree as the focal point. Honestly wouldn't be a very interesting room to use in-game, but that's not the point here.
Read more... )

lin_net: pixel art of a Honey Shroom from Paper Mario (Default)
I'm pretty tired of trying to repeatedly reference video tutorials for Blender stuff, so I'd like to start taking notes and posting them for my own reference! Maybe they'll be useful for someone else too.

This post is loosely referenced from this video.

5 to 3 Edge Loops

screenshot - reducing 5 to 3 edge loops in blender

We're starting with 5 edge loops that we'd like to reduce down to 3. We'll need one perpendicular edge loop to work with.

On the edge where you'll be reducing the number of edge loops, select the center edge. Move it inward toward the higher-density region. You can see this forms a trapezoidal negative space- select the four vertices that border this trapezoid and create a new face. Now you have three edges that you can extrude out. You can adjust the size so the new faces end up an even width.

3 to 1 Edge Loops

screenshot - reducing 3 edge loops to 1 in blender

This follows the same steps as the previous example.

4 to 2 edge loops

screenshot - reducing 4 edge loops to 2 in blender

On the edge where you'd like to reduce the number of edge loops, move the two center edges inward and extrude out the single vertex between them. Make two new faces on either side using this new center vertex and extrude those out into your lower-density region.

Applied

screenshot example of edge loop reductions applied to a model

I intended to make some sort of little homunculus approximating an arm attached to a torso. What I made, by accident, is a very bad Geodude.

Odds to evens?

Trying to connect odd numbers of edge loops to even ones or vice versa gets kind of ugly! You can do it, but you'll end up with something at least a little weird and asymmetrical.

Misc Notes

If you're working on an existing model to clean up edge loops you probably won't actually be extruding, etc! You can just slide the edges around instead and apply cuts as appropriate, dissolve edges, etc. (Did you know about the connect vertex path tool? If you're making straight cuts across connected surfaces, it's probably a faster and easier option than the Knife tool.)

February 2022

S M T W T F S
  12345
6789101112
13141516171819
202122232425 26
2728     

Syndicate

RSS Atom

Most Popular Tags

Style Credit

Expand Cut Tags

No cut tags
Page generated Jul. 15th, 2025 01:59 pm
Powered by Dreamwidth Studios